How to Install Low-Voltage Landscape Lighting (DIY Guide)
Transformer, cable, fixtures. Real wiring steps for the safe low-voltage system.
- Free, no-obligation quotes
- Fully insured & guaranteed
- Serving the Greater Toronto Area
- Fully insured & WSIB
- Landscape Ontario standards
- Serving the area since 2008
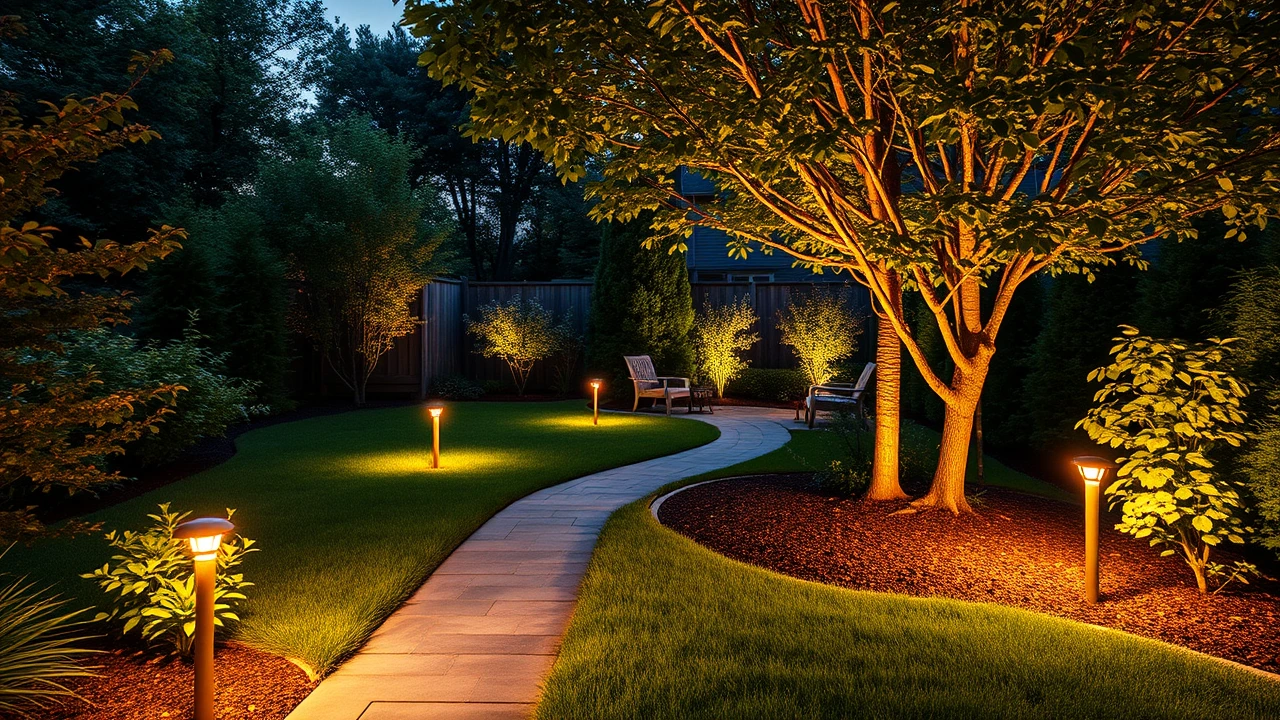
Low-voltage landscape lighting is one of the most rewarding DIY landscape projects. Done well, it transforms how the yard looks and feels after dark. Done poorly, it creates dim, uneven, or unsafe spots. Here is the step-by-step.
What you will need
- A 12V landscape lighting transformer with timer/photocell (sized for total wattage)
- 12-2 low-voltage landscape cable (12-gauge, 2-conductor)
- LED landscape fixtures (path lights, well lights, spotlights as appropriate)
- Wire connectors (waterproof gel-filled, NOT regular electrical caps)
- A weatherproof exterior 120V outlet to plug the transformer into
- Spade and trenching tool
- Wire stripper and crimper
Why low-voltage and not line-voltage?
Low-voltage (12V) systems are safer (a person touching a live wire feels almost nothing), legal for DIY installation without an electrician, easier to modify or add fixtures to later, and use far less energy. Modern LED fixtures are 2 to 6 watts each, so a full residential lighting design typically runs on a 200 to 600 watt transformer.
The installation steps
Step 1: Plan the lighting layout. Walk the yard at dusk with a flashlight. Note where you want pools of light (path turns, steps, seating areas, feature plants, trees worth uplighting, the house facade). Sketch the fixture positions and approximate cable run on a sketch of the yard. Aim for a mix of fixture types: path lights for walking, downlights from trees for moonlight effect, uplights for architectural elements, and well lights for trees and key plantings.
Step 2: Size the transformer. Add up the wattage of all the planned fixtures (e.g. 8 fixtures at 4W each = 32W total). Pick a transformer 25 to 50% larger than the total (gives headroom for adding fixtures later). Typical residential systems use 200, 300 or 600 watt transformers. The transformer needs a dedicated weatherproof exterior 120V outlet within 1.5 m of where you mount it. Mount the transformer about 1 m above grade on the wall of the house or a fence post, in a position where the timer can be read easily.
Step 3: Run the main cable. Lay the cable on the ground following your planned route. Run it close to fences, beds and walkways where it can be tucked under mulch later. Do NOT bury yet. Leave 1 m of extra cable at each fixture position. The cable can run up to 50 m from the transformer before voltage drop becomes a real issue; on longer runs, return a separate cable rather than continuing one long loop.
Step 4: Install the fixtures. Set each fixture in position. Path lights press into the soil; uplights mount on a small stake. Aim each fixture before connecting (the angle matters more than the brand). Path lights aim along the path, not at the viewer. Uplights aim into trees from below, not into windows. Test the position at night with a flashlight before committing.
Step 5: Wire each fixture to the main cable. Each fixture has two wire leads (often labeled ‘common’ and ‘positive’, though polarity does not matter for AC low-voltage systems). Use waterproof gel-filled wire connectors to splice the fixture leads onto the main cable. Strip back the cable insulation about 1 cm at each tap point, insert the fixture leads into the connector, and crimp. The gel inside the connector keeps moisture out for years.
Step 6: Connect to the transformer and test. Strip the two main cable ends and connect to the transformer terminals (the transformer has labeled terminals). Plug the transformer into the outlet. The fixtures should all light up when you press the manual override on the transformer. If any fixture does not light, check the connection at that point. If all fixtures are dim, you have a voltage drop issue and may need to add a second home-run cable from the transformer.
Step 7: Bury the cable and clean up. Once everything works, bury the cable 10 to 15 cm deep in beds and along walkways. The cable does not need conduit; landscape cable is rated for direct burial. Mulch over the cable runs in beds. In lawn areas, slice into the soil with a spade and tuck the cable into the slit. Mark cable routes on your sketch in case you ever need to find them again.
Step 8: Program the controller. Most transformers have a built-in timer plus photocell. Set the photocell to turn lights on automatically at dusk and the timer to turn them off late (10pm to midnight depending on your preference). Some homeowners run lights all night for security; this is fine with LED systems because energy use is minimal.
Common mistakes
- Aiming uplights into windows or at the road. Light pollution and unhappy neighbours. Always aim into trees or the home, never outward.
- Using regular wire connectors instead of waterproof gel-filled ones. The connection corrodes in a year and the fixture stops working.
- Too many fixtures (lighting everything). Restraint is better. 6 to 12 well-placed fixtures look great; 25 fixtures lighting everything looks like a parking lot.
- Wrong colour temperature. 2700K to 3000K (warm white) looks natural; cooler temperatures look harsh and clinical outdoors. Pick warm white for residential use.
- Skipping the photocell setup. Manually turning lights on and off gets old fast.
Frequently asked questions
Do I need an electrician for low-voltage lighting?
No. The 12V side of the system is legal for DIY installation in Ontario. You only need an electrician if a new 120V exterior outlet has to be installed for the transformer. If you already have an outlet, you can do the whole project yourself.
How much does a DIY landscape lighting system cost?
A basic 6 to 10 fixture system runs roughly $400 to $1,200 in materials (transformer, cable, fixtures, connectors). Professional installation of the same system runs $2,500 to $5,000 because it adds design time, optimal placement experience and a manufacturer warranty.
Can I add to the system later?
Easily. As long as the transformer has spare wattage capacity, you can splice in more fixtures with the same waterproof connectors. This is one reason to oversize the transformer at the start (250-300W transformer for a 100W initial install gives room for 5x growth).
What is the colour temperature I should pick?
Warm white (2700K-3000K) for residential. Cooler temperatures (4000K+) feel commercial or industrial outdoors. Most landscape fixtures default to warm white but it is worth checking the product spec.
How long do landscape LEDs last?
50,000 to 100,000 hours of run time, which translates to 15 to 25 years at typical residential use (4-6 hours per evening). The transformer and connectors usually fail before the LEDs themselves.